Christmas Card Round Up!

It's the last day of 2010!!  Another  year that has gone by so quickly.  A year full of fun, laughter, new babies, surprises, challenges and maybe a few tears, but a great year all in all!  So to finish up the year, I wanted to 'show off' the beautiful handmade cards that found their way to my mailbox.  I love Christmas with all the 'happy' mail you get, especially Christmas Cards!!

1.  Window Card from my friend Jen &  2.  Christmas Tree bird card from my wonderful friend Cheryl (who also just happens to be married to my dad!)


3.  Ribbon card from my very crafty friend Michelle &  4.  Reindeer card from the very lovely Kate


5.  Tree card from my lovely cousin Frances and her daughter Olivia &  6. Snow card from my friend Annette


7  &  8. Handmade cards from Holland


9. Snowglobe card from the very talented Kerri!


10.  Australian Christmas Card from one of my 'oldest' (in friendship years only!!) friends Yvonne!


I'm sure you'll agree all these cards are very clever and very beautiful.  Lucky me!!

Sweethearts Offer from Stampin' Up!

Sweethearts!

Earn yourself free Sweet Heart Treats Cups with qualifying purchases until 24 January 2011!


Get a FREE pack of Heart Treat Cups when you purchase the Sweetheart Stamp Set or the Full Heart Punch.

Make it twice as sweet when you buy both and earn TWO FREE Heart Treat Cups!
Item
Page
Description
Price
121576
38
Sweetheart Wood-Mount Stamp Set
$38.95
120780
38
Sweetheart Clear-Mount Stamp Set
$29.95
119883
146
Full Heart Punch
$33.95
120435
122
Heart Treat Cups
FREE
with purchase

Click here for the Valentines Sweethearts Flyer.


Contact me if you have any queries or would like to purchase these wonderfully discounted Stampin' Up! products!

Merry Christmas

From my house to yours, wishing you all a Merry Christmas ....

Something Different

Yep, that's right, I tried something different with these Christmas Cards.  I used black.  It's such a non-Christmas colour but with white ink and some embossing, they don't look too bad!  What do you think?


I tried the new In-Colours of Poppy Parade and Pear Pizzazz and they held up well too.  Add a bit of silver metallic thread to my ornaments, some rhinestone jewels, a bow and they're done!!

Well, that's it for me.  It's Christmas Eve day now ... so must get into food preparations now.  I hope you're having a lovely Christmas Eve too :o)

Last Minute Cards

Thought I would pop in with some last minute cards as we now look even closer to Christmas.  And these really are last minute cards, literally.  I was finishing them up last nights!!  I had lots of strips of Jolly Holly DSP to use and this is what I did!

This card was inspired by an Andrea Walford design!  I made two actually, each a little bit different but I forgot to take a photo of the other one :(  I also got to use my scallop border dies which were just ace!


This design then inspired my own versions, including this one:


I then dusted off my Dasher stamp which I hadn't used, and made these:


And in a last effort to use up some paper strips, I tried some paper weaving!


I hope you enjoyed these Christmas cards and maybe you can make some last minute ones too!

12 Weeks of Christmas - Week 12

Week 12 of our 12 Weeks of Christmas @ Stamp with Me!

Each week, I will showcase a Christmas themed project in the lead up to Christmas to make your gift-giving easier and with that special handmade touch. At the end of each week, you will be able to download each project's supplies and instructions (available in PDF format). 


This week we've got fun gifts for kids!!
 
Contact me if you would like a copy of the PDF instructions

 If you have any queries on the projects, please contact me. All products unless specified otherwise are all Stampin' Up! and I am able to assist with all your Stampin' Up! needs.

Quick Christmas Cards

Help!! It's less than a week until Christmas and I'm frantically trying to get my cards done and in the mail!!  Lucky they're not going overseas otherwise they'll not get there to next year!!  So I needed some Christmas card designs that were quick!  And I mean quick!!  These are my latest bunch of cards that I was able to do, relatively quickly!!


Both these designs use the Snow Swirled stamp set (I still love that set), and have a few bits and pieces added.  
Snowflake Card:
Stamps: Snow Swirled
Papers: Whisper White, Old Olive CS and Christmas DSP (retired)
Inks: Early Espresso
Other: Dazzling Diamonds, Eyelet Border Punch & Chocolate Chip Taffeta Ribbon

Christmas Tree Card:
Stamps: Snow Swirled & Punch Pals
Papers: Whisper White, Real Red and Old Olive CS
Inks: Baja Breeze, Bashful Blue & Early Espresso
Other: White Satin Ribbon, Word Window Punch, Rhinestones & Red Kindy Glitz

Fingers crossed I get the rest of them done tomorrow ... I have to have to use store bought cards!!

12 Weeks of Christmas - Week 11

Week 11 of our 12 Weeks of Christmas @ Stamp with Me!

Each week, I will showcase a Christmas themed project in the lead up to Christmas to make your gift-giving easier and with that special handmade touch. At the end of each week, you will be able to download each project's supplies and instructions (available in PDF format). 


This week we've decorated notepads for a new look!!
 
Contact me for your copy of PDF instructions for this project

 If you have any queries on the projects, please contact me. All products unless specified otherwise are all Stampin' Up! and I am able to assist with all your Stampin' Up! needs.

Just a peg or two...

I love the idea of upcycling, instead of recycling, you re-purpose items for other uses.  Even though not all projects have come together as planned (aka the mouse trap project!!), some projects do!!

Take for example, some simple wooden pegs that you might have lying around the home.  Give them a new life with a bit of paper and embellishments.  I've used the Stampin' Up! current Christmas range of Designer Papers - Jolly Holly!  You'll be pleased with what you can do!!


Leave them plain (like the first peg), of dress them up with bits of ribbons, flowers and buttons.  They're quite cute!!


After Christmas when I 'unpeg' them from my their current use of pegging Christmas cards, I'm going to stick magnets on their back and put them on the fridge.  Magnet Pegs are fantastic for all the bits and pieces of papers you have sticking to the fridge.  You could even go fancy and paint the pegs first.  I didn't get a chance this time ... but there's always another time!!

And by the way, with all the rain we're getting at the moment, there's no missing them on the washing line!!  Using dryer racks inside at the moment.  Who would have thought it's summer and a week before Christmas, crazy?

Christmas Love Notes

OK, I'm back on my blogging roll (in other words, I'm not running ahead, I'm just catching up all in one go!!).  I've made 30-ish Christmas cards but I needed some cards to pop in the mail to my lovely SU customers with their Summer Mini Catalogues.  Searching for some pre-scored and folded cards, I found an opened packet of Love Notes complete with envelopes.  Voila!!  I'm on a roll!


I used the Baroque Motifs stamp (don't you love how you can use non-Christmas stamps for Christmas!!) and added some embellishments by way of ornaments.  While this idea isn't original, I made it my own. 

 
I've used the Ornament Punch to cut some ornaments from Jolly Holly DSP and tied each with silver metallic cord.  It's not really clear in the picture, but there I've added a little bit of bling with a rhinestone just above the ornament and of course, each ornament had to be hanging from the 'branch'!!  Trusty old pen and ruler for that one!!

Stamps: Baroque Motifs & Occasional Greetings
Papers: Whisper White CS & Jolly Holly DSP
Inks: Old Olive
Other: Silver Thread, Ornament Punch, Stampin' Dimensionals

Match boxes?

Do you have empty matchboxes lying around?  If you do, don't throw them out. Re-purpose them and make cute little chocolate gift boxes. Perfect for a chocolate!! If you don't have empty matchboxes, well make your own.  There are plenty of websites around with templates for matchboxes.  Easy Peasy!

Anyways, I saw this cute little Snowman pop-up Matchbox the other day over at the Stamping to Share blog.  So I decided to try one myself!  They're really cute and you can get instructions over at the Stamping to Share blog too!


I used some scraps of Jolly Holly DSP and the Punch Pals stamps to make this little project.


As you open up the matchbox, you see my little penguin sitting on the chocolate.  But when you open the box further, you see him pop up and stand to attention!


Isn't he cute!  I also added lots of glitter under his feet so that it could look like shimmering snow!

Here's what I used:

Stamps: Punch Pals
Inks: Basic Black, Baja Breeze, Real Red & Old Olive
Papers: Whisper White & Real Red CS, Jolly Holly DSP
Other: Scallop Circle & Circle Punch, White Grosgrain Ribbon, Kindy Glitz (Red), Dazzling Diamonds Glitter, Rhinestones, Stampin' Dimensionals and Acetate.

One question remains to be asked - now that I've shared this project, can I eat the chocolate now????

Look what I got!

As promised, I wanted to show the lovely gifts I received as part of the International Handmade Gift Exchange!  You might remember I sent a little package to the lovely Jocelyn the other day (click here) well I'm so pleased to say I was absolutely besides myself to receive some gorgeous handmade gifts from Jocelyn.  Just have a look at what I got!


Necklaces, rings, cards, zip bracelet.  Woohoo!!  I'll also be back to show a picture of my cute-as Scrabble tile necklace!!  I'm wearing it at the moment, so I'll take a photo of it later.  To see more of Jocelyn's gorgeous work, head on over to the Rusty Barrel Boutique!

A Scottie Dog

It must be getting closer to Christmas as I'm running SO BEHIND!!

But I did make a little feltie for my sister-in-law.  She just loves Scottie dogs so when I saw this little dog, I just had to make one for her!  But lets go back to the beginning:

The other day, I shared my gift for the International Handmade Christmas Gift Exchange that I participated in.  I have NOW received my gift and will be sharing it with you tomorrow :0).  TO see the Gift Exchange, just click here.  While looking at all the other gifts that were part of the Gift Exchange, I stumbled upon this gorgeous little Scottie Dog.  So cute!  As Margie (my SIL) loves Scottie Dogs and has two little black ones, I had to make her a Scottie Dog Christmas Ornament.  I didn't want to do black though (not Christmas-y) so I kept with traditional Christmas colours and to complete the little dog, he got a tartan bow.  Too cute!!


Tomorrow I'll go back to my stamping projects and the 12 weeks of Christmas projects, but I just had to share this little pup!

Mouse Traps

Eek!!  That's what you hear me screaming when I see a mouse.  And I'm not much better at looking at mouse traps either.  But I like mouse traps.  They are good.  They do useful things!!

And well, strangely enough, one of those useful things, is making Note Holders.  Well I tried, I really tried!!  On Monday night, I went to our Avid Inkers SU Team Christmas night where we exchanged Santa gifts, ate the yummiest Christmas food and made ourselves a little project.  WE (yes, the Royal We) made little Mouse Trap Note Holders which required the un-assembly of the mouse trap. Decorate the mouse trap and then reassemble the mouse trap.  Sounds easy???  Well.  Maybe not for me.  After much frustration and bits flying everywhere I then used Crystal Glaze to hold my mouse trap bits in place.  But then I couldn't set the mouse trap.  So my husband kindly took it apart and then assembled it for me.  Properly.  I then lifted the mouse trap bar to put in my note paper and 'Spring' bits flew everywhere.  So after a little tizz, I pulled it all apart (AGAIN), ripped off the now destroyed papers on top and redecorated and re-purposed the mouse trap!

To see the instructions and what a Mouse Trap Note Holder looks like - visit the Creative Pizazz Blog.  To see what I made, keep reading!!!

So, what to do, what to do.  That was the question.  I decided to use a little clip from last years Clip Assortment I had and used the fantastic sticky strip to hold in place.  It's very sticky!!

I've added a flower and button to the top corner.  Some magnet strip on the back and it looks ok!

And it's more easy to use than the mouse trap I think.  It doesn't snap at you!!


And yes, I'm very happy with my now completed project.  Although a disaster at the start, it turned out just great.  I even had some DSP left over to decorate a Bulldog clip.  Noice!!  I"m so loving this Elegant Soiree papers too.  Very noice!!

So if you want to make the project I completed, it's super easy and ask away for instructions.  If you want to make the mouse trap note holder.  Don't ask me.  Just go straight to the Creative Pizzazz blog and ask the designer!!  I'm handing my mouse traps in and looking for new projects!! Although I have to say, it looks mighty fine my project.  The magnet strip on the back means it's now sitting on my computer box and where I will clip my list of things to do!!

Here's what I used:

1.  Elegant Soiree DSP adhered to the front of the wooden block of the mouse trap.  The mouse trap had been sanded prior for smoothing of edges.
2.  Edges have been inked with Gold metallic ink.  Looks great if I say so myself.
3.  The paper flower has been misted with Smooch Spritz (vanilla) and it's petals sponged with a touch of Early Espresso ink.  A blue button has been tied with crochet thread and stuck on with glue dots.

Too easy!!

December 2010

It's already December 11!!  Can you believe the days are just flying past?  As we head into Christmas season, end of the school year and the usual hustle and bustle, sometimes it's good to just stop.  And stop, I had to!!  Baby Jess has been up and down with temperatures over the last week, grizzly and just not her happy self.  Yesterday, we got a diagnosis and with the help of anti-biotics she is a happy little baby girl again.  Thank heavens!!  So now while she sleeps peacefully, I can catch up on my blog, my Facebook and my crafting.  Hooray!

Inspired by a card I saw by Andrea Walford, I used it to design my December 2010 calendar page.  Can you believe it?  It's the end of another calendar year!  So here it is (yes, I'm late with it as usual - but I figure why change now at the end of the year!  Best to change my bad habits next year!!!):

Here's what I used:

Stamps: Snow Swirled
Papers: Bashful Blue, Whisper White & Crumb Cake CS
Inks: Crumb Cake, Baja Breeze & Night of Navy
Other: Scallop Trim Border Punch

12 Weeks of Christmas - Week 10

Week 10 of our 12 Weeks of Christmas @ Stamp with Me!

Each week, I will showcase a Christmas themed project in the lead up to Christmas to make your gift-giving easier and with that special handmade touch. At the end of each week, you will be able to download each project's supplies and instructions (available in PDF format). 


We've got some more Christmas Stocking projects again.  More cards and a box!


Contact me if you would like a copy of the PDF instructions

 If you have any queries on the projects, please contact me. All products unless specified otherwise are all Stampin' Up! and I am able to assist with all your Stampin' Up! needs.

Did you hear me sigh?

If you heard my sigh, it's one of exhaustion!!  On Friday, I went on an overnight trip to Melbourne to attend a U2 concert with my sisters which rocked and was absolutely awesome!!  Although I don't pull up so well these days (anymore).  Going to bed at 2am and back up again at 6.30am when Jessica decided to wake up, didn't give me a whole lot of sleep.  Back home again to Canberra that afternoon makes for a little ol' tired me.  And I think that's the realisation, I'm not 20 anymore!!  Still tired today but a whole lot better then yesterday!!

Unbelievably it means I'm too tired to be creative today.  Instead I'm sorting out my ready-made card stash for upcoming birthdays, events and of course Christmas.  I always fall short on Christmas cards, so I had better get some energy to make some more tomorrow!!

But today, I wanted to show you a couple of cards I made as Anniversary cards based on a card I saw in the 2010-2011 Idea Book & Catalogue.  If you're ever looking for inspiration, this is the place to go to as all stamp sets are demonstrated within the Catalogue somehow!!

This first card is for my husband on our 7 year wedding anniversary the other day.  It had to be a card that wasn't too girly:


I liked it so much, I decided to send one to my sister who also celebrated her wedding anniversary last week too!


To see the original card, turn to page 100 in your Idea Book & Catalogue or view online here.

Here's what I used:

Stamps: Baroque Motifs & Punch Potpourri
Papers: Crumb Cake, Whisper White & Very Vanilla
Inks: Crumb Cake, Pacific Point & Tangerine Tango
Other: Tangerine Tango & Pacific Point Grosgrain Ribbons (retired), brads, Heart Punch, Word Window Punch, crochet thread, Stampin' Dimensionals, scissors & sponges

And that's it for wedding anniversaries this year .... mind you, next year isn't far away at all!!

Handmade Gift Exchange

This year I participated in the International Handmade Gift Exchange!  Hosted by Craftaholics Anonymous, we were required to make a Handmade Gift for a person carefully selected and matched to you.  In return, a Handmade Gift would be sent to you in return.

Of course, I joined in (who wouldn't for such a wonderful idea) but then the hard bit came .... what to make!!  So I brought together some of my favourite craft types to make a little package!!

Firstly, I made a Softie from felt (my all-time favourite craft at the moment) and made these cute little Christmas Mittens (one for me and one for my gift exchange, as I hate parting with something I've made unless I've made two!!):


I made them from Christmas red felt, stitched with a blanket stitch and then decorated with white (handcut) snowflakes, ribbon and buttons.  I made one with a folded cuff and one without, and they both looked good!!

I then added a little Washer necklace I had made using the (now retired) Bella Rose papers from Stampin' Up! (love those papers!):


The necklace was then carefully hidden into the little mitten (the perfect gift keeper!):


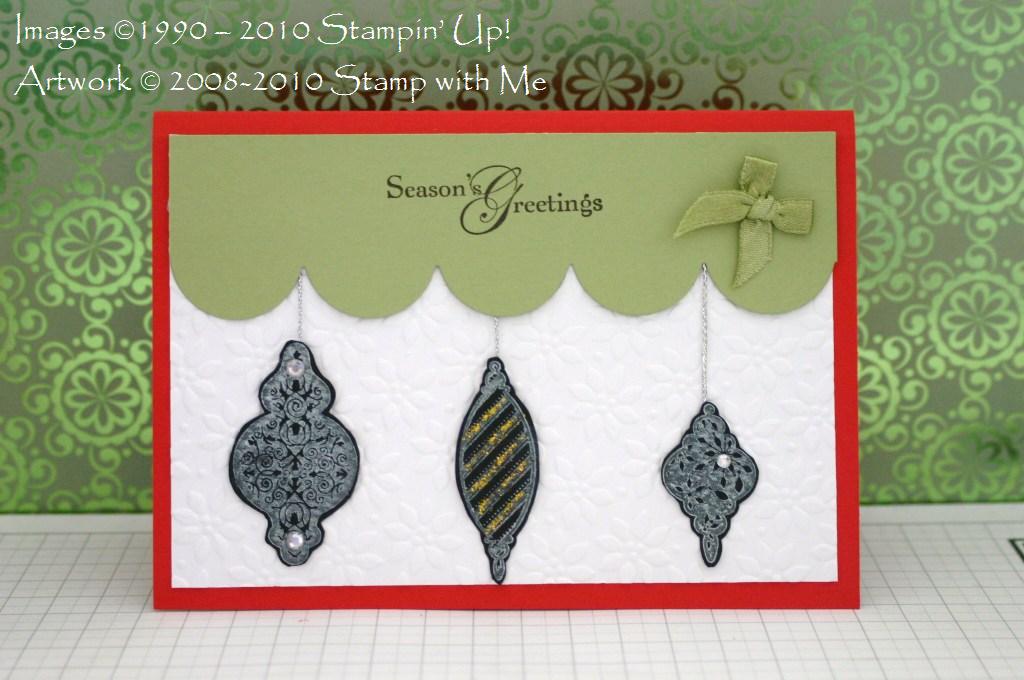
I then put them all together with a little card I made (of course, you knew there would be a card didn't you?):


I then wrapped them all with some blue tissue paper and made a ribbon & flower tie for the finishing touch!


The little flower was cut with my Big Shot and a Flower Layers die (love how these dies cut through felt), tied up with a button and sewn onto the ribbon.  These photos show the cute little layers. 

So now this little package is on the way to my Gift Exchange partner - Jocelyn.  I hope she likes them!

Here's what I used:

Mitten: Red & White felt, red thread, satin ribbon & button
Necklace: Washer, white paint, Crystal Effects (SU), Bella Rose DSP (SU) and circle punches, beads and bead findings, leather strap
Card: Whisper White CS, Fun & Fast Notes stamp set, Stampin' Write Markers (all SU)
Wrapping: Blue tissue paper, Green, Blue, White & Purple Felt, button, satin ribbon & cotton thread

Now I had better get back to the business of making cards and gifts for my own family!!

Summer Mini Catalogue is here!!

Looking for some new products for Summer?  Have a look at the  new and very gorgeous 2011 Summer Mini Catalogue from Stampin' Up!  Available from December 2010 to March 2011, it's sure to please!


All my regular customers can expect their very own copy in the mail soon.  You can also view the Summer Mini Catalogue online - just click here!

It's December Frenzy Time!

Enjoy up to 50 percent off great Stampin' Up! products during our December Frenzy sale!


Between 1 to 29 December 2010, receive up to 50% off selected Stampin' Up! products during the December Frenzy sale.  There are no limits and no minimum purchases to qualify!! 

Choose from these fantastic SU products: 
Item
Page
Description
Retail Price
Sale Price
119181
39
A Little Treat Wood-Mount Stamp Set
$21.95
$10.98
120018
39
A Little Treat Clear-Mount Stamp Set
$15.95
$7.98
119189
40
Tote-Ally Tess Wood-Mount Stamp Set
$37.95
$26.57
111255
43
Daisy Dash Jumbo Stampin' Around Wheel
$15.95
$9.57
121482
56
Baby Bundle Wood-Mount Stamp Set
$49.95
$34.97
119161
72
Autumn Days Wood-Mount Stamp Set
$38.95
$19.48
120012
77
Pendant Park Clear-Mount Stamp Set
$27.95
$13.98
113031
88
Tart & Tangy Wood-Mount Stamp Set
$21.95
$15.37
115806
91
Fresh Cuts Wood-Mount Stamp Set
$38.95
$27.27
115946
102
Wonderful Favorites Wood-Mount Stamp Set
$39.95
$23.97
119167
104
Heard from the Heart Wood-Mount Stamp Set
$38.95
$23.37
119185
105
Teeny Tiny Sentiments Wood-Mount Stamp Set
$62.95
$31.48
105115
118
Pumpkin Pie Stampin' Write Marker
$5.75
$4.03
105106
119
Certainly Celery Stampin' Write Marker
$5.75
$3.45
100045
119
Pretty in Pink Stampin' Write Marker
$5.75
$3.45
105114
119
So Saffron Stampin' Write Marker
$5.75
$3.45
105111
119
Bashful Blue Stampin' Write Marker
$5.75
$3.45
105108
119
Regal Rose Stampin' Write Marker
$5.75
$3.45
105109
120
Bravo Burgundy Stampin' Write Marker
$5.75
$3.45
100069
120
Night of Navy Stampin' Write Marker
$5.75
$4.03
100082
121
Basic Black Stampin' Write Marker
$5.75
$3.45
103104
122
Small Cello Bags
$7.50
$4.50
111325
140
Styled Silver Hodgepodge Hardware
$57.95
$28.98
112530
140
Circle Scissor Plus
$54.95
$32.97
116681
161
Kind Heart Wood-Mount Stamp Set
$11.95
$5.98

Click here for the December Frenzy Flyer and contact me if you have any queries or would like to purchase these wonderfully discounted Stampin' Up! products!

LinkWithin

Blog Widget by LinkWithin
Blogging tips