hip hip hooray

Hip Hip Hooray Card Kit
Introducing the wonderful and new Hip Hip Hooray Card Kit!
Hip Hip Hooray card kit from Stampin' Up! includes EVERYTHING you need to make 20 cards:
  • 20 Card Bases
  • 3 piece Hip Hip Hooray Stamp set
  • Clear stamp block
  • Dimensionals
  • Basic Grey Stampin' Spot (ink pad)
  • Twine
  • Clips
  • 20 Envelopes
  • Adhesive Die Cut Embellishments
  • Full Colour Instructional Brochure
20 EASY CARDS for a variety of special days! Why get your cards at the store? You've got 20 cards at your fingertips. Theyrre thoughtful, they're beautiful, they're handmade, and they take just minutes to make!

Click here for the Hip Hip Hooray flyer and order yours today!

Flutterbyes

Well it's no secret I love butterflies.  So many of my projects feature them!  So when I wanted to make a card for my friend's daughter who has moved away up north for her gap year, I wanted to send her a card that wished her well for the year ahead, whatever that year will bring.

And so I'm on a bit of a SVG roll at the moment, so I decided to make a Butterfly Shaped Card!!


It was a really windy day, so it was hard to take photos of this card showing all the layers (you wouldn't know it was windy in these photos though!!).  I cut the card layer with Whisper White CS, so it formed the base for decoration and the card itself.  I then added two layers of patterned DSP that I had in my stash.  I think it was Nursery Necessities from last year perhaps!


I punched little flowers, scrunched them up and used sequins or little pearls as the centres, or in the case of the yellow flowers left them plain.  I added sequins for sparkle, some little black eyes and a tiny teeny sentiment.  It's really cute and when you fluff out the layers it looks wonderful.  I've made a second card too, but not quite finished yet, so I'm  hoping I'll be able to capture the layers a bit better!!

The Butterfly Shaped cutting set is available at the Cutting Cafe.

To the Moon & Back

I always say my kids that I love them to the moon and back.  They love it and so do I, so when I needed to make a birthday card for a special little boy, I decided to use that as my theme and I think I'll use it later for a scrapbook theme too!


So I was totally inspired by a card I saw on Pinterest and got out my punches and started thinking.  Mainly thinking, that's a lot of punches!  Hmm.  Maybe there is an easier way!  Lets try the Cricut using my SCAL software.  Such a treat to have my Cricut working now!!  Firstly I started by making a large basic circle which I cut with the Cricut.  I then used a few of my small circle punches to cut out the 'craters' and sponged with a tiny bit of Crumb Cake ink.  I then adhered to the second circle which was left plain to make the moon!

I then started thinking about my little rocket flying to the moon.  I found a Rocket SVG file (which I can no longer find where I found it - was a freebie thanks to a google search).  Using my Cricut, I cut it from Pumpkin Pie CS and used scraps to make the features of the rockets.  Lots of little circles to adhere! My little rocket is propped up with Dimensionals.


 I've used my Daffodil Delight to make stars for the card and die cut the ric-rac edge from Pear Pizzazz CS.  A little birthday sentiment and the card was done.
 

This was a great card to make with the kids, they loved sticking all the stars and rocket bits together!

So here's what I used:
Stamps: Teeny Tiny Sentiments
Papers: Basic Black, Whisper White, Daffodil Delight, Pumpkin Pie & Pear Pizzazz
Inks: Basic Black
Punches: Circles, stars and hole punch
Big Shot: Ric Rac Die, Cricut & SCAL software

Flower Garden

Today's share uses the Flower Garden Embossing Folder which I bought a little while ago but put it in the back of my Embossing Folder box and forgot all about it.  So when I needed to make some Sympathy cards recently, I thought they would work well for a card that needed to be elegant but simple.


I've used the Flower Garden embossing folder to emboss a Whisper White matt that I've sponged lightly with Coastal Cabana and Lucky Limeade ink.  I've added a punched scallop border as it just needed something extra!  I've then used a background of Coastal Cabana.  Gosh I love that colour.


I've made a second card using Melon Mambo as the feature colour, adding sponging with Melon Mambo and Lucky Limeade ink.  Both cards have a teeny sentiment stapped and I've added white ribbon to both, just to add a touch of elegance.


I love both colour combinations and they're not too over the top for sympathy cards.  Both cards have used a Whisper White card base which is so pretty and tones down the bright colours.

So I've used:
Stamps: Teeny Tiny Sentiment
Inks: Coastal Cabana, Basic Black, Melon Mambo & Lucky Limeade
Papers: Lucky Limeade, Whisper White & Melon Mambo CS
Accessories: Sponge Daubers, Scallop Border punch & various ribbon
Big Shot: Flower Garden Embossing Folder

Pinterest inspiration found here.

Superman

So when you have nephews and boys of your own, you're always on the hunt to make the perfect boys card.  And as they get older, it gets trickier as you have to move on from the cute boy stuff and onto more boy-ish things.  So when I heard my nephew was into super heroes, well I knew I just had to make a superhero card!!


So I decided to go with Superman.  Superman was always my favourite and I know my nephew loves Superman too.  Rather than using punch art, I decided to go for a google search for superhero svg files and found the perfect Superman logo.


I cut the logo using my Cricut from Real Red, Brilliant Blue and Daffodil Delight.  Perfect!  I popped it onto a Brilliant Blue card base which I had embossed with my Honeycomb Embossing Folder.

I added a little birthday sentiment and of course the all important number five, popped up with Stampin' Dimensionals.  Cute!

I found the Superhero SVG files at this link!  So Happy Birthday Mikey, the card and the presents are in the mail for you.  But no more clues!!

Ombre with dots

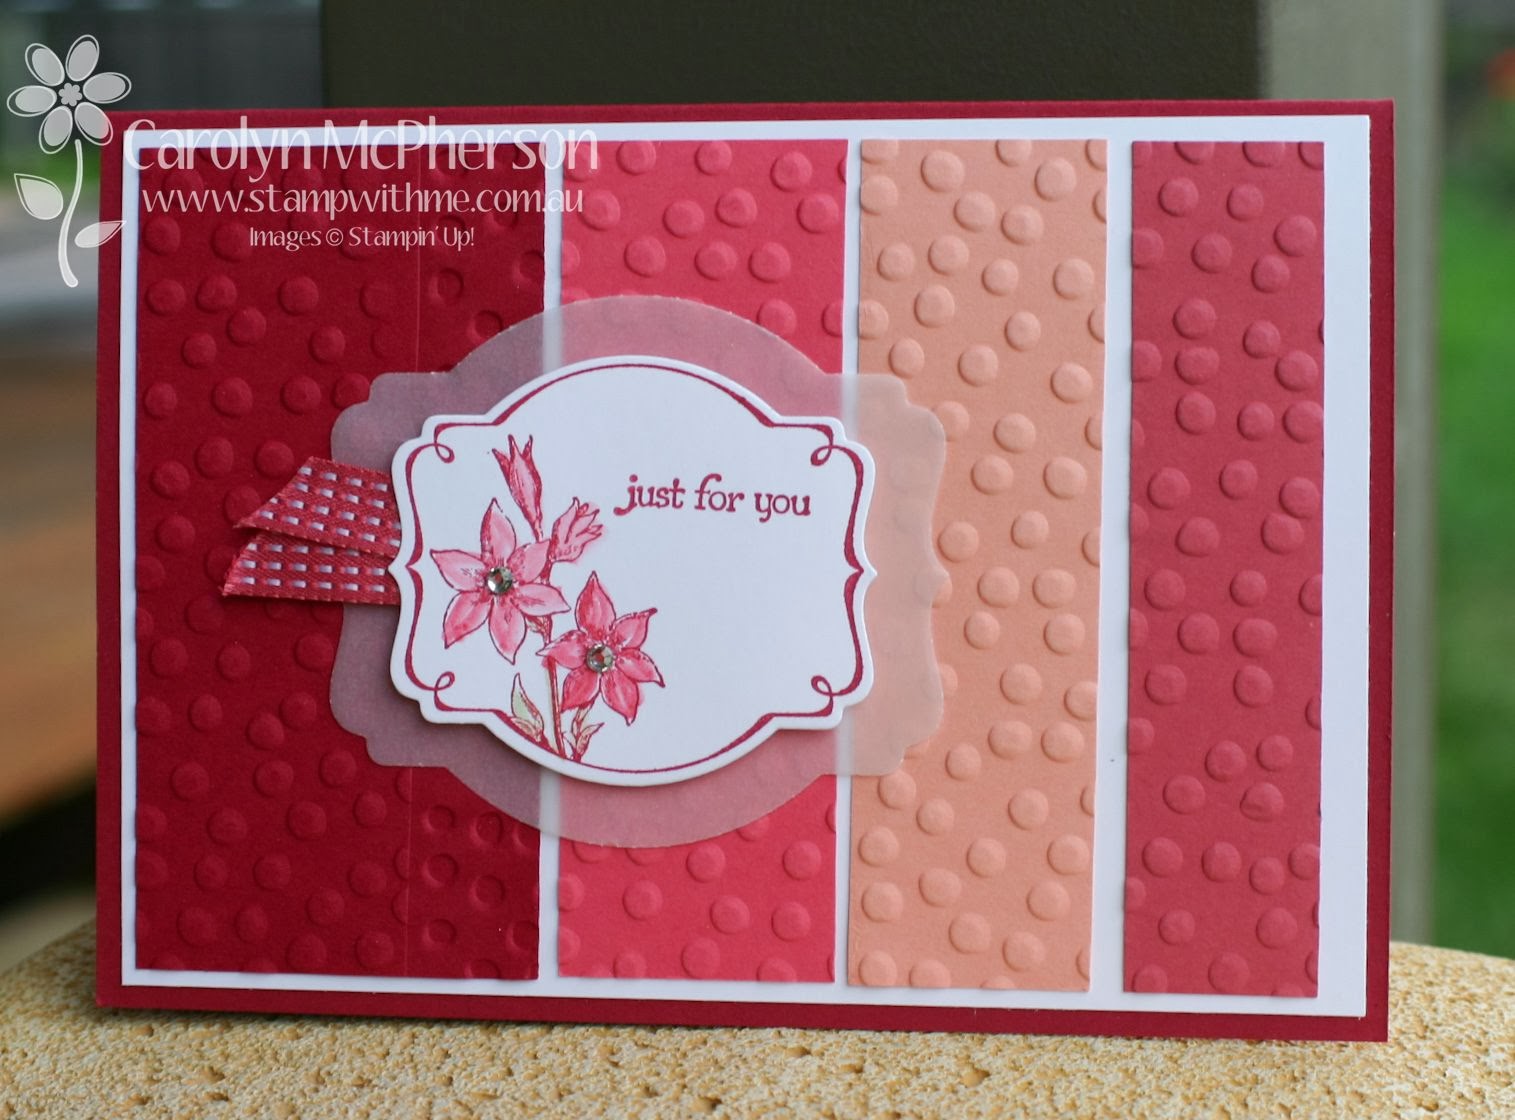
Eek!  It's five days since I last shared a project.  Where did that time go???  So it's high time I start sharing projects again, including this one we made at our Avid Inkers Team Meeting last week.  I love ombre and hadn't played with that effect for quite a while, so I was so excited to be making this card!!  This card was demonstrated by one of my lovely friends and she had given us instructions to bring a Raspberry Ripple card base and a Whisper White card front.   Hmmm, mysterious.  But now I can reveal!


Isn't it just divine!  I love these colours and would never have thought to put them together like this.

All the colours were cut into strips of varying width and embossed with the Decorative Dots Embossing Folder, free in this year's Sale-a-Bration!


We then made a pretty focal image using Vellum cardstock and then a matching little flower stamp (You're Lovely) also from Sale-a-Bration which we used our Blender pens to colour.  So cute!

So here's what we use:
Stamps: You're Lovely
Inks: Raspberry Ripple, Strawberry Slush & Pear Pizzazz
Papers: Raspberry Ripple, Strawberry Slush, Crisp Cantaloupe and Primrose Petals, Whisper White CS and Vellum CS
Accessories: Raspberry Ripple satin stitched ribbon & diamantes
Big Shot: Decorating Dots EF & Labels die

I did a google search too, and the inspiration of this card is found here: Too Cool Stamping

Paper Roses

Just had to share these gorgeous Paper Roses made by my very lovely and talented friend Rebecca.  Her roses are divine and too good not to share:


All roses are shown in the gorgeous colours of Stampin' Up!s colour ranges, and you can custom order the colour to suit you.


Available by the stem or as a bunch.  Perfect for that special occasion.

Beck's business is 'Blooms by Beck' making Paper Roses. They are $5 for single long stem rose or $50 for a bunch of 12 in a bouquet. Made to order and happy to post. Great for Valentines Day. To order contact Beck direct: createwithbeck@hotmail.com


Best of Greetings

Best of 25 years stamp collections.
 
As part of Stampin' Up!s 25-year anniversary celebration, we're bringing back some of our favourite stamp images from the last quarter century and combining them into five sets, which will be released -one set per month- until April 2014. Even better, along with some great classic images, each "Best of" set will also include a never-before-seen image!
 
This month - it's the Best of Greetings!
 
Some things to remember:
  • All Best of stamp sets will include 3-5 images, including a never-before seen image, and will be priced at $25.95.
  • While we are releasing just one Best of stamp set per month (with a new theme each month) until October, all of the Best of sets will be available until April 2014.
  • All Best of stamp sets are available in Clear-Mount only.
  • The stamp images may be sized differently from the original stamp sets.
 

Bright Blossom

So it's been another week of hot weather, which really makes crafting difficult when you are feeling hot and sticky.  Sometimes as much as I want to create, I end up finding something cool and relaxing to do.  So when I had to make a whole bunch of cards, and I mean a whole bunch!! I needed something easy to do but would still make an impact!

I chose this series of designs using some of my favourite colours, like Raspberry Ripple, Lucky Limeade & Coastal Cabana.  And a little bit of Summer Starfruit thrown in!


I started with this design using one of my note cards.  It turned out OK but the sentiment stamped in River Rock just didn't sparkle as much as I thought it would


So I tried a different stamp from the set and added some punched flowers too. Not bad but not quite what I was looking for either.


 So I settled on this design where I've flipped the card, fancy embossed the bottom of the card, stamped my cute little bright blossoms and tied off with twine.


I've also changed the ink colour to Smokey Slate which I think works a lot better for the card.


I've used Island Indigo bakers twine for interest to the card, wrapping it around twice and tying off into a knot or a bow.


I've stamped the blossoms in Island indigo or Coastal Cabana which look so pretty.


 I've also added little butterflies from a scrap of Baja Breeze cardstock using the Beautiful Wings sizzlit.  It truly was the card I wanted in the end to send out to all my lovely customers and friends with their new Catalogues.

This card was of course inspired by Pinterest and was the perfect card for making many of on a hot and I mean hot summer day!!

LinkWithin

Blog Widget by LinkWithin
Blogging tips