Florets

OK, this npost is a long time coming.  It's a card back from September but for some reason blogger hasn't allowed me to post the photos.  Until now!!

This card is for one of my lovely friends.  She certainly deserved a card with colour!!


I've used the Fabulous Florets set.  It's a gorgeous set with lots of flowers (my fave stamp you know!!).  I wanted to use colours that were striking so I turned to my new In Colours for this one!


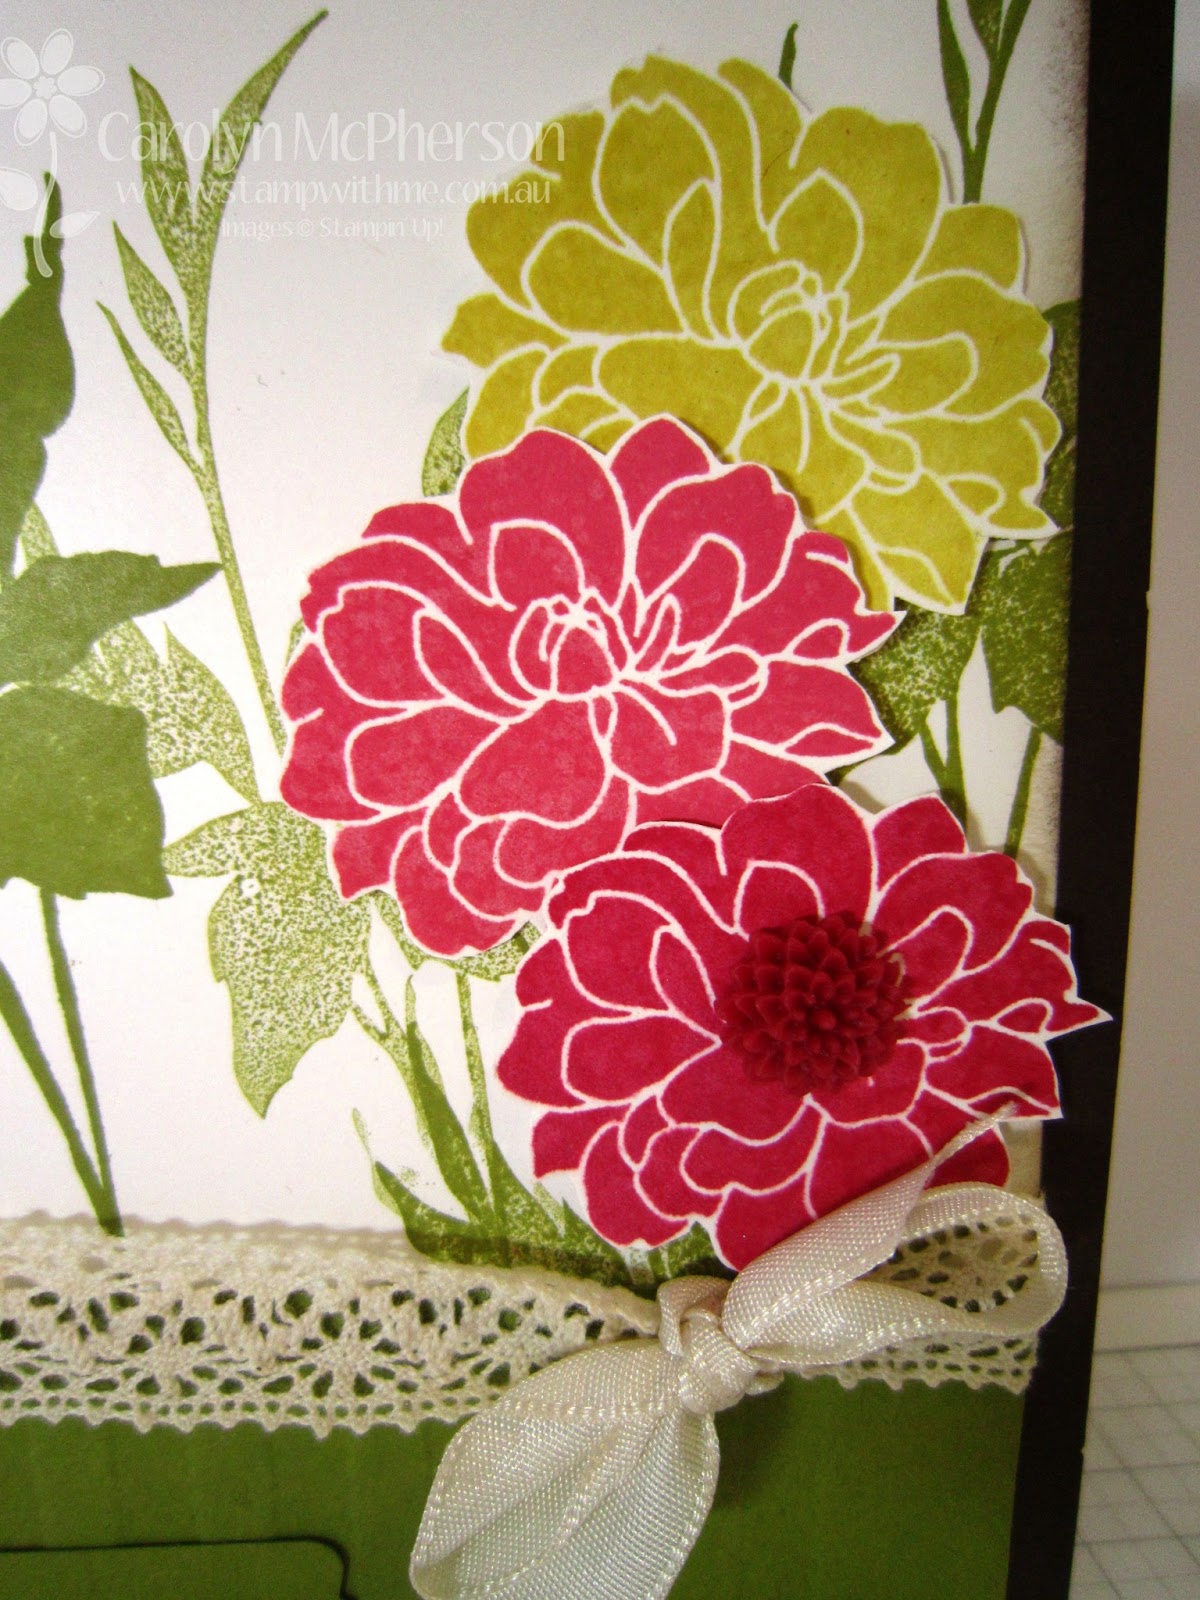
I've stamped my flowers in Summer Starfruit, Primrose Petals & Raspberry Ripple.  Gorgeous and bright!  Can you see the little resin flower on the Raspberry one.  They're called In Colour Dahlias and they're the cutest thing ever!!

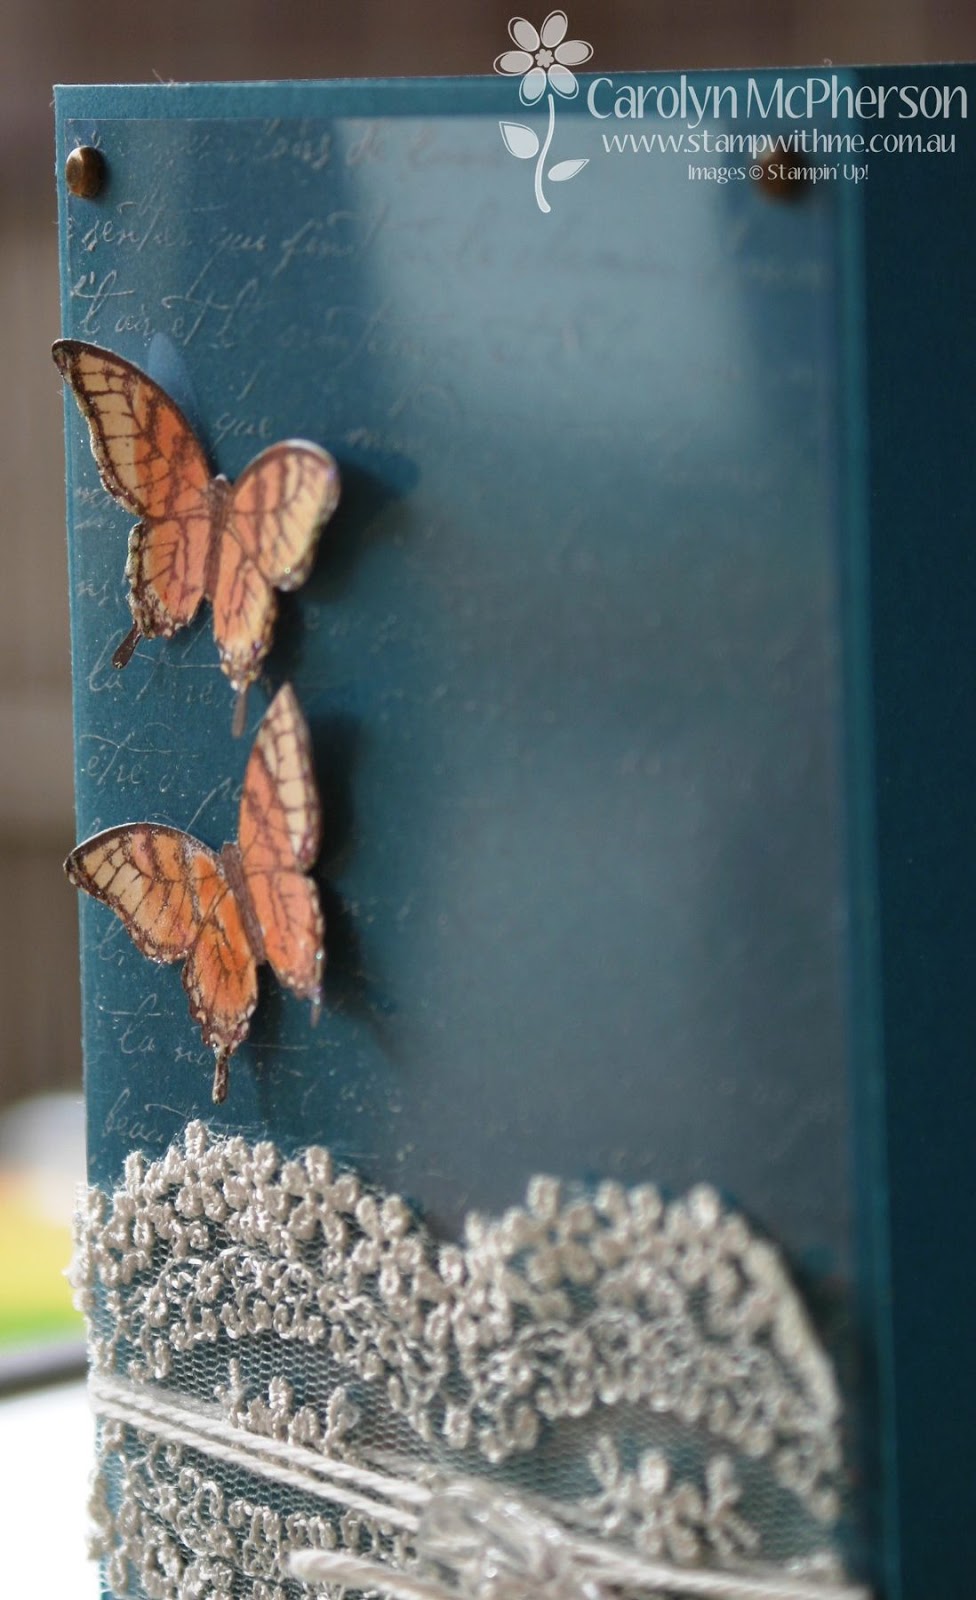
I wish I had taken more photos, but I've used Victorian Trim lace, Very Vanilla taffeta ribbon to tie off.  Stamped leaves in Old Olive and embossed the bottom layer of Old Olive cardstock with the Stripes embossing folder.  Lots in this card but all for a great cause!

So here's what I used:
Stamps: Fabulous Florets & Teeny Tiny Sentiments
Inks: Old Olive, Raspberry Ripple, Primrose Petals, Summer Starfruit & Early Espresso
Papers: Old Olive, Whisper White & Old Olive CS
Other: In Colour Dahlia, Victoria Trim lace, taffeta ribbon, Modern Label punch, Big Shot & Stripes Embossing Folder, glue dots & sponge dauber


Butterflies

So yesterday's card was all about my crafting with acetate.  Well attempting too anyway.  Did I mention yesterday that heat embossing causes acetate to warp?  You can trust me on that one!  So I ended up with scraps of warped overlay.  Hmmm what to do..

So I had already made my card with the new Swallowtail butterfly stamp.  It's big, it's gorgeous!


It's so big, you can't even fit it entirely on a standard card front.  I've stamped with Whisper White craft ink and then embossed with Iridescent Ice embossing powder.  Lovely, especially in real life.


I've then used scraps of Sycamore Street DSP on the bottom of the card and stamped my old-time favourite Vintage Vogue flowers.  I've used a rhinestone gem for one of the flowers too.


Just above the flowers on the left, you can see a little clear butterfly.  Yep, I used my scrap pieces of warped acetate which had been heat embossed with the French script stamp.  I punched them out with the new butterfly punch and tied some bakers twine around for little antennae!

Scraps obviously are not meant to be thrown away, the moral of this story!!

Here's what I used:
Stamps: Swallowtail & Vintage Vogue
Papers: Pool Party & Whisper White CS, Sycamore St DSP
Inks: Whisper White craft ink, Island Indigo, Pool Party,Tangerine Tango & Gumball Green classic ink
Other: Bakers Twine, acetate, gem, Iridescent Ice embossing powder 

Acetate

So I've joined in on another challenge, see this post for my last try!  I know, risk-taking behaviour for sure!  But this time, I think I'm on time.  I hope.  Hold on I had better go check ........  Yep, all good.  It's another challenge over at Crafters Anonymous.  February's challenge is to use Acetate!

So I decided to try something daring.  .....  Well it is daring for me (wink wink)!! An acetate overlay.  In theory, I was going to stamp the French Script stamp all over and emboss with white.  Hmmm, seems acetate melts or warps with the heat.  See risk-taking, daring behaviour already (lol)!  So I just tried stamping with White craft ink instead.

I did leave it for a good hour or so to dry.  Even more probably as I was at my Sunday crafting session and it was ALL day of fun!  I did manage to rub some of the inked words off though.  Adds to that vintage look, maybe.

I've used the new gorgeous lace from the new Artisan Embellishment Kit.  Isn't it gorgeous.  I've used Whisper White bakers twine to fasten the lace to the card, and tied off with a gorgeous faceted button also from the kit.


To fasten the whole acetate layer onto the card base of Island Indigo, I used four vintage brads.  Too easy!

One thing I've learnt, is that using acetate overlays are quite difficult to photograph.  That's my pink and white striped tshirt in the background of this photo.  I tried taking photos inside and outside to see if I could achieve a reflection-free result.  Not really.  Side on was better though!


I've stamped two butterflies onto Whisper White cardstock with Early Espresso ink and used my blender pens to colour in with Peach Parfait & Tangerine Tango.  Glue dots to put them on.  Presto it was done.  I'm quite happy with the card.  I haven't finished the inside yet (that bit is still naked).  But it will be a birthday card when it's done.  You can almost see the tiny birthday sentiment I used!

So here's the products I used:
Stamps: Papillon Potpourri, French Script & Happiest Birthday Wishes
Inks: Whisper White Craft ink, Early Espresso, Tangerine Tango & Peach Parfait Classic ink
Papers: Island Indigo & Whisper White CS
Other: Acetate, Artisan Embellishment Kit (lace & button), vintage brads, bakers twine & glue dots.

Project Share

Well, it's seems I'm running behind already.  I'm sure my New Year's wish was to be on time with things.  Some things I am, and some things, well ..... they're just as they are!  Anyway, I wanted to share a couple of projects from the Avid Inkers meet up night we had earlier this month.  I've already shared the Oh Hello card that I loved.  Well here is another project organised by one of our lovely members - Annette. 

So our first project was a cool card.  It was 3-D!  I think that's what you call it.  When you opened it up, it had a pop up.  Maybe it's called a pop-up card?  Whichever, it's really cool!!


We actually didn't start with the front of the card which I think is super cute.  I love the cute little Patterned Occasions stamp set from the new Sale-a-Bration stamp set.  Love the bandaid!


So you might have noticed a lot of Sale-a-Bration product here.  I've used the papers, ribbons and embossing folders!!

The best part of the card, we made first.  A pop-up!!


Isn't it cute!  It looks like a little tissue box and it has a little piece of tissue inside too.  The perfect card to make for someone to get well!!


And from a side on, inside view you can see the paper does fold back and the piece of tissue is still there!!

So here's what I used:
Stamps: Patterned Occasions
Papers: Sycamore Street DSP, Whisper White, Crumb Cake & Island Indigo CS
Inks: Tangerine Tango & Island Indigo
Other: Sycamore Street - Pool Party ribbon, Rhinestone, Big Shot & Vine Street Embossing Folder, Scallop Circle & Circle Punch

And don't forget your tissue!!

Postscript: The all important instructions (Thanks Annette xx)


Project One – Tissue box card

Supplies:
Half A4 cardstock
DSP 6 ¼ “ X 3 ¾ “
Sticky strip
Ruler, pencil

1.      Score and fold card
2.      Score DSP along long edge at 1 ½”, 3”, 4 ½ “ and 6”
3.      Find centre of panel near narrow strip and punch word window
4.      Place a piece of sticky strip along narrow strip and form box
5.      Put SS on both edges of “back side” of box and one (outer) side of “bottom”
6.      Cut tissue in half and separate ply sheets.
7.      Attach tissue to box slit.
8.      Decorate front of card.

Florals

I had a look through my stash of stamps the other day and I realised I had a lot of flower based stamps.  Lots in fact, although never the ones I seem to think I have.  Maybe because I've forgotten to put it away and I have it hidden under a pile of papers.  Or something.

So the other day when I made a Sympathy card for a dear friend, floral stamps are somehow just the right stamp to use! 

I used my very new (as in never used, break open the packaging) set called Everything Eleanor.  It's a lovely stamp set and can be used for so many occasions.  Even the more difficult ones.

I've stamped my flower in Early Espresso ink onto Very Vanilla and die cut leaves in Early Espresso cardstock.

 
I've added some tiny pearls to the little stamens of the flower in the centre only.  As you can see I've also used a strip of Primrose Petals cardstock to add a contrasting colour.  It's a sweet colour actually and one I haven't used that often.

I've used a trusted stamp for the sentiment and the card was complete.  It's a lovely card to make, whatever the occasion, and can really be brightened up with some different colours too!

So here's what I used:
Stamps: Everyday Eleanor & Close as a Memory
Inks: Early Espresso
Papers: Crumb Cake, Very Vanilla, Early Espresso & Primrose Petals
Other: Big Shot & Swiss Dots embossing folder, Little Leaves sizzlet and pearls

Oh Hello!

Ever had something you didn't want, not really even thought about, was no where near on your radar or wish list?  Well that was me and the Oh Hello stamp set in the new Seasonal Catalogue!  Saw it, thought about it, and then moved on.

That was until my lovely friend Beck showed me a card she had made.  And of course, we all just had to make the card too.  And now I want that stamp set.  Need it actually!

 
 There you go!  Isn't the card just gorgeous?  Not my designed and pretty much cased completely from Beck.  I think the only thing different was the direction of the chevrons stamped under the flowers. 


 Speaking of flowers, how adorable are those little flowers in cream. OMG I love them.  Another new product in the Seasonal Catalogue on page 5.  The flower trim is gorgeous, delicate and in Very Vanilla.  I've read you can also use the Ink refills to change their colours too.  Oh my!


The card is Perfect Plum.  And I love that colour too.  Strangely enough, I don't have and didn't think to have it.  But the flowers, also stamped in Perfect Plum and Gumball Green are just gorgeous too.

So here's what we used:
Stamps: Oh Hello
Papers: Perfect Plum & Very Vanilla CS
Inks: Basic Black, Perfect Plum & Gumball Green
Other: Silver Brad, Flower Trim and adhesives.

To see more of Beck's beautiful work, check out her blog: Create with Beck!

You can see the gorgeous Oh Hello stamp set on page 4 of the Season Catalogue or download it as a PDF file here.

Love Jars

Well, I well and truly missed Valentine's Days this year.  My WH doesn't celebrate Valentine's Day very often and he certainly didn't celebrate this year.  Much to my disappointment of course but that doesn't mean I'm not going to do anything for Valentine's Day!!  I already had a stash of cards that I had made last year, so I didn't need to make any more this year..... But I wanted to do something sweet.  So with all the Jar Love happening out there, I decided to do my sweet little version.

I used my really cute Mason Jars that I had been stashing for many reasons.  I found one of my doily's that I had stashed away.  Speaking of doilies have you see the cute one's included in the new Seasonal Catalogue? 


I used the Scalloped Heart of Hearts Embosslit to cut a little heart from Red Riding Hood CS.  I glued to the doily which I wrapped around the jar.  I then used some thick jute string to tie a little bow.  It's really hard to tell from the picture, but I've put a little tea-light candle in the jar.  It sends off a cute little glow.


It's the type of project to add some warmth to your dinner tables, with the glow of the tea-light candles.  Using scented candles would be really cute too.  They are super easy to make and you can make a lot of them, in a hurry, in many different styles, for any occasion.  Just need to save those jam jars ...... and then keep them away from your little ones who want to keep blowing the candles out!!

Another Challenge

Well, it's another challenge that I hit and missed!!  I saw this gorgeous challenge over at Crafters Anonymous which had a beautiful inspiring photo and recommended the colours of Sahara Sand, Gumball Green, Real Red and Bashful Blue.

But if I can tell you anything about myself, I miss deadlines or close to it anyways!  I am so good at organising but my follow through, hmmm.  So I made this card in plenty of time for the December-January challenge BUT forgot to submit it.  So instead I submit here .....


I've used the new Embossing Folder - Honeycomb on the Sahara Sand background.  Love it.  I've used strips of Bashful Blue DSP, and Old Olive (I didn't have Gumball Green) CS for the leaves which I have cut with my Bird Builder Punch and added scored 'leaf' lines.  I've stamped my flowers with Real Red ink.

I've also added touches with my little blue butterfly, my doily background.  I love my Doily Die!!  A staple on my strips of blue and of course a sentiment.  I really liked how it turned out too!

So here's what the challenge inspiration looked like:


NOICE!!  Hope I can make the next challenge by it's due date!!

Some more!

Well, I've been having a wonderful time with the new Sale-a-Bration products especially the Bloomin' Marvellous stamp set.  Gees, I haven't mentioned that at all previously, have !? (wink ;)

So I've had a lot of fun working on a small collection of projects for Sale-a-Bration make & takes.  Such as this:

You've already seen the card on the left, and the little desk calendar or fridge calendar (depending on your choice of display).  But there is also a little card that matches the set.  It's so sweet!

 
Rich Razzleberry is my feature colour and I love this shade of purple.  It goes so great with the coordinating colours too!


Have I mentioned that I am part of a fantastic group of girls who meet regularly for craft.  Affectionately known as the Hooterbelles, we always have a hoot of a time.  Lots of laughing, chatting and even making!!  Last Friday night we made a little calendar and some of the girls made the bloomin' marvellous card too.  Here's my calendar.  This one is for the fridge:

Well, I think that's it now for this collection of Sale-a-Bration projects.  No doubt, I'm going to find more to make.  Interested in a Sale-a-Bration workshop?  Just contact me!


Birthday Curios

So I'm in a card-making frenzy.  Seriously.  After a long rest, worn out from making Christmas cards, it's just wonderful to go back to the table and play with new products, old products and especially pretty products!!  So it was with much pleasure that I needed even more birthday cards for friends.

 
This card was a Pinterest inspired card.  I loved how the original card used a doily (I'm a bit of a doily fan you know) and added a little butterfly.  But of course, inspiration to means, means to take a card and add my touch to it.

 
I added a layer of embossed Sahara Sand CS, embossed with the new Honeycomb Embossing Folder, which means to me - HEXAGONS!!  And I rather like hexagons!

I've added a strip of Melon Mambo DSP, a butterfly and some pearl bling.  It's funny, I used the paper clip to hold it all in place so I could machine-sew across the stop.  I liked it so much, I left it there!

And if you look closely, you can see little images stamped within the honeycomb shapes.  I've used the new Collage Curios from the Seasonal Catalogue.  A really fun set with little images.

Anyway, I hope this card has found it's way to its new home by now.  I'm sorry I can't link back to the original card that inspired me.  Turns out I hadn't pinned it like I thought I had, and now I've got no way of finding it to credit the designer.

To make a card like mine though, here's what I used:

Stamps: Collage Curios & Teeny Tiny Sentiments
Inks: Early Espresso & VersaMark
Papers: Sahara Sand, Bashful Blue & Whisper White CS and Patterned Pack DSP
Other: Big Shot, Honeycomb Embossing Folder, Doily, Butterfly Punch, paper clip, sewing machine & pearls

Bloomin' Cards

OK, I'm back with more projects made with Sale-a-Bration products!  There's just something about this year's Sale-a-Bration products that I love.  It surprises me too, as I wouldn't have ordinarily picked these colours or this style as me!  So, let me show you!


 I just love the Bloomin' Marvellous stamps.  The cute little butterflies are just adorable.  And I love the little verses that go with it too.  Oh Happy Day.  I'm singing away to myself now (Boney M if you must know).


I've stamped the butterflies in Pool Party & Rich Razzleberry which coordinates perfectly with the paper from the Sale-a-Bration Sycamore Street raneg.  So cute!!  I've also tried this in another colour-way too:


This card picks up the colours of Island Indigo, Tangerine Tango and Rich Razzleberry too.  So bright and funky!

And of course, butterflies require glitzing too with some cute little bling!!  Of course, I've used Early Espresso ink to stamp my little sentiment and sponged the edges of my die-cut with Crumb Cake.  I love Crumb Cake ink for sponging.  I think that's probably all I use it for too!


So here's what I used:
Stamps: Bloomin' Marvellous (Sale-a-Bration)
Inks: Tangerine Tango, Rich Razzleberry, Pool Party, Early Espresso & Crumb Cake
Papers: Crumb Cake & Whisper White CS, Sycamore Street DSP (Sale-a-Bration)
Other: Big Shot, Labels die, Whisper White Bakers Twine, Bling & Sponge Dauber

And to think that all the Sale-a-Bration can be yours for free!!  Contact me for how you can earn products for free too!

New Seasonal Catalogue

New 2013 Seasonal Catalogue!

The Seasonal Catalogue is here and it has got to be one of the BEST ever.
 
It's full of seasonal products, perfect for this time of year!


Want to see yourself?
Well click here to see the Holiday Catalogue online!!

You can also download it as a PDF so you can read on your computer, ipad or tablet or smart phone at any time!!

Please contact me if you would like to have your own Stampin' Up! Holiday Catalogue (for Australian Residents only).

LinkWithin

Blog Widget by LinkWithin
Blogging tips