Bold Blossoms

After spending a lovely Easter weekend down in Melbourne, I made a few cards for my sisters to let them know I appreciate them.  Now that I think of it, I'm hoping they got them as I haven't heard either way!!


It's not often I thank my sisters (just for being my sister), as I'm the oldest and therefore considered the bossiest, etc etc.  But I can't imagine life without them!  I have two sisters and a brother too by the way, I'm just don't think my brother would appreciate a girly card being sent to him ;)


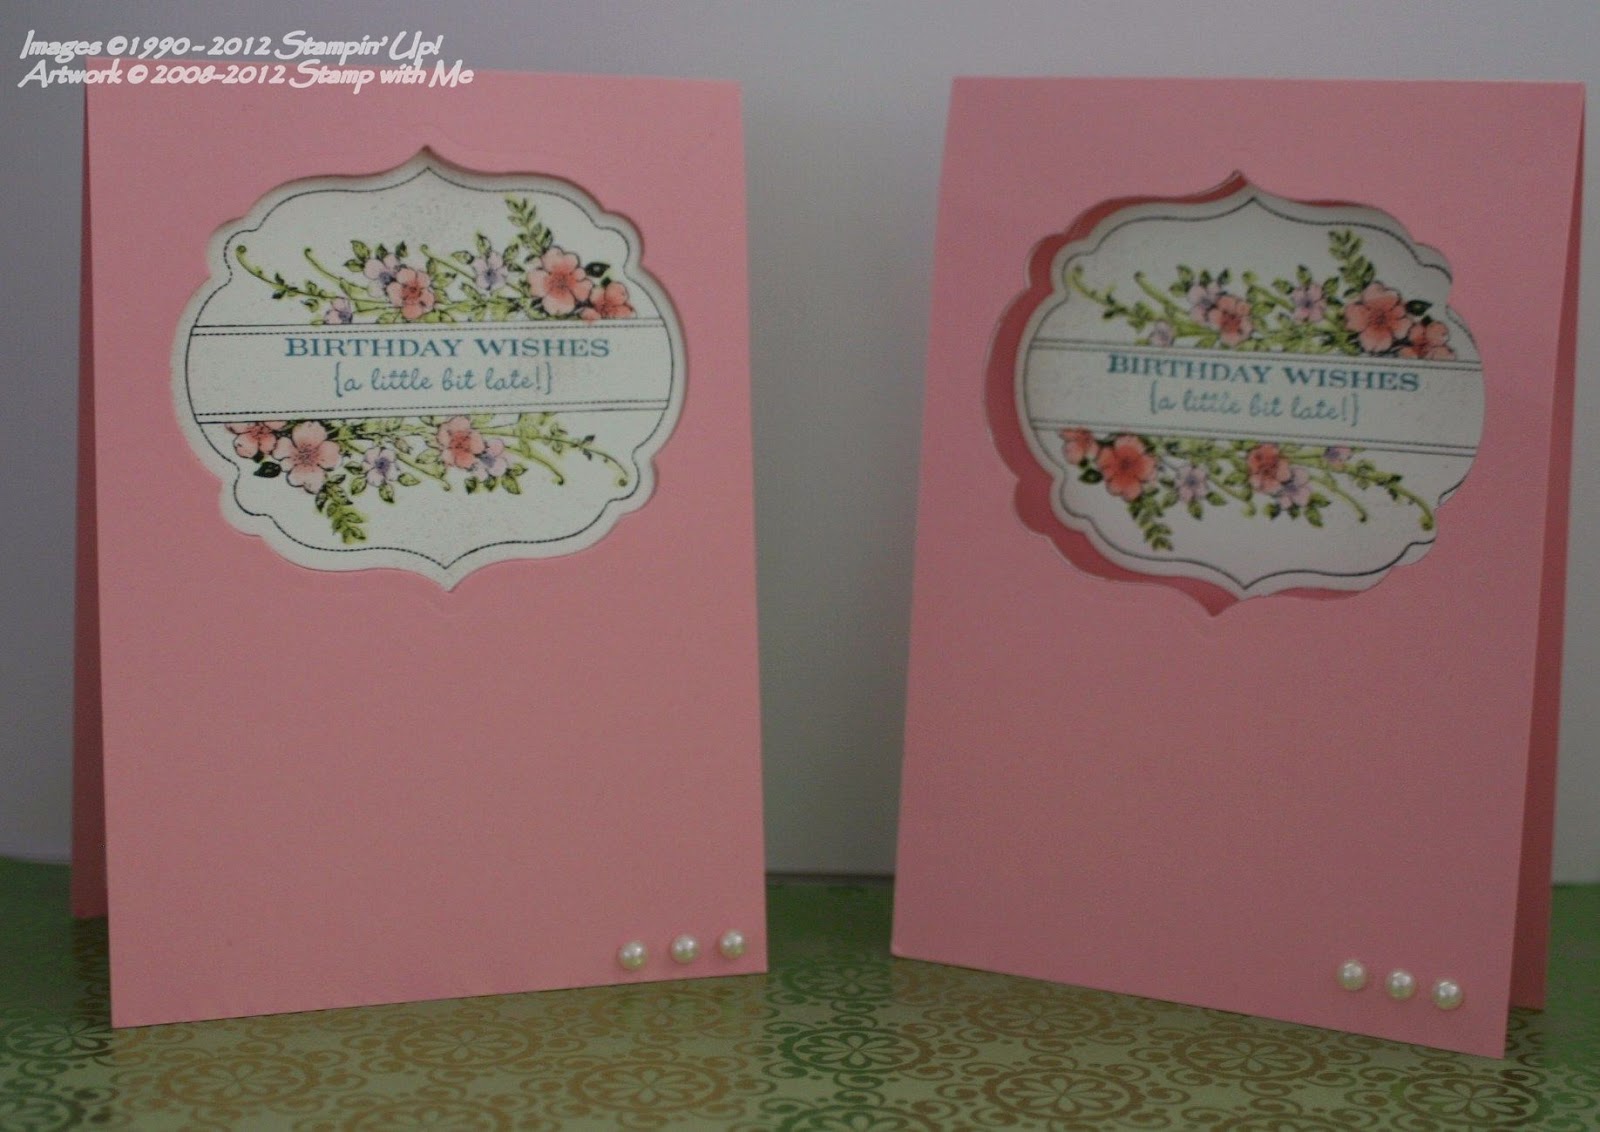
These cards made me reach out for a few of my supplies that hadn't been touched in a while - the Melon Mambo ribbon and some buttons.  All the more reason to make cards and send to my sisters!!
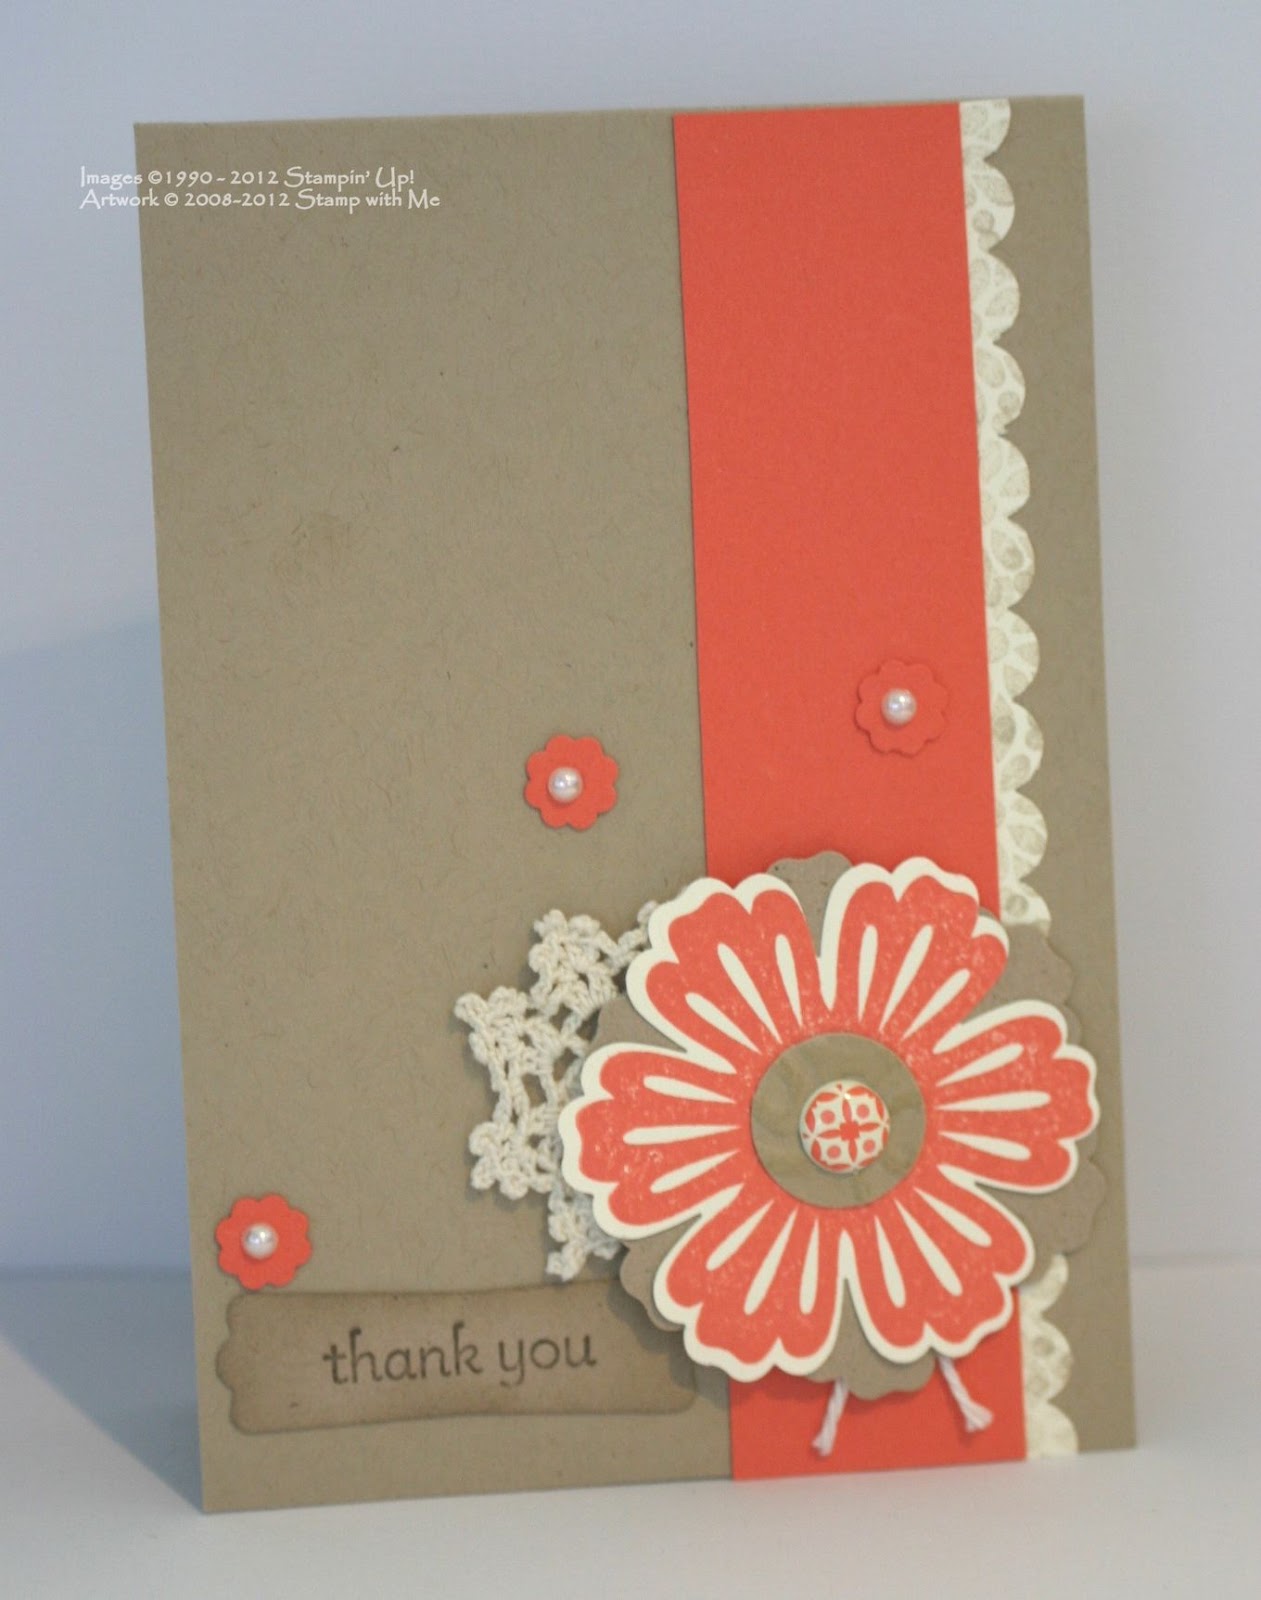
Here's what I used:

Stamps: Bold Blossom
Ink: Melon Mambo, Pool Party & Lucky Limeade
Papers: Whisper White & Melon Mambo CS, Subtles patterns DSP
Other: Blossom Bouquet punch, Scallop Border Punch, ribbon, button, glue dots & crochet thread

Maybe I might send a card to my brother .... it just can't be girly!!

A Mixed Bunch

Have you got yourself a copy of the SU Autumn-Winter Mini catalogue yet?  It's just gorgeous and brimming with new products!!

I'm in love with the Mixed Bunch stamp set and the coordinating Blossom Punch.  Love Love Love.  I've pinned so many cards using these stamps and punches on Pinterest!!  I also saw in blogland a card using these products.  I've been so inspired by it, that I made this card:


I've added a few changes of my own, particularly the little doily poking behind the flower.  I love how the colour Tangerine Tango coordinates perfectly with the Crumb Cake cardstock too.    If you're inspired to make this card, I used the following:

Stamps: Mixed Bunch & Bold Blossom
Inks: Early Espresso, Tangerine Tango & Crumb Cake
Papers: Crumb Cake, Whisper White & Tangerine Tango CS
Other: Blossom Punch, pearls, brads, doily, Scallop Border Punch, Circle Punch & Crochet thread

To see the original beautiful card, head on over to this website - StampingwithSteph

Wedding Cards

I have a confession to make.  I bought a stamp set from the Summer Mini that I had no real use for, but bought as a just in case!!!  Just in case I needed to make a wedding card.  This stamp set called Marry Me is just gorgeous and I do have plans of using it to scrapbook my wedding one day!!  Sadly this set is no longer available, but I just had to share the card I made!!


I stamped the bridal couple with versamark ink and then embossed with clear powder.  I embossed the white background and added a delicate punched edge.  I got to use pearls too which is always a plus.

I really liked this card and the colours of purple were chosen specially!!

Here's what I used:
Stamps: Marry Me
Papers: Whisper White, Concord Crush & Wisteria Wonder
Inks: Versamark & Early Espresso
Other: Big Shot & Vintage Wallpaper Embossing Folder, Pinking Hearts Border Punch, Owl Punch, Clear Embossing Powder and pearls

I hope the bride enjoyed her wedding card !!

Two Tags Post-it Note holder

So, I've been a bit hit and miss with blogging lately.  Just life keeping me very busy.  Sometimes I think, yes it's easy to combine, home with work and three kids but then sometimes I get a reality check!!  This week its been about my kids and sharing the last week of their term holidays with them!  But I did find a moment to take some photos of cards and projects, do a little photo-editing and water marking, and now posting them up here!

Today I wanted to share this cute little project I made as gifts: Two Tags Post It Note holders.  They are so cute and so easy!!


These are a great little project for making gifts as well as using up scraps of your favourite papers, such as the Sale-a-Bration papers!!


Stamp your favourite sentiment inside and add your post it notes, and the gift is complete.  I also love how the die cut has it's own notch to close the holder.  Too easy.  Add some coordinating ribbon and it's done!!


And of course you need bling.  All girls need bling :0) and what gift would it be without bling!!

Here's what I used:

Stamps: Punch Potpourri & Precious Butterflies
Ink: Calypso Coral, Marina Mist & Early Espresso
Papers: Marina Mist, Pearch Parfait, Whisper White, Everyday Enchantment and Subtles DSP
Other: Pear Pizzazz Ribbon, Bashful Blue Ribbon, rhienstones, post-it notes, mini glue dots.
Cutting Tools: Big Shot, Two Tags Die, Butterfly Punch & Corner Punch
  
For full instructions head on over to the Chic' n Scratch website, you can even download the instructions as a PDF!

Gift Chocolate Boxes....

Well, the correct title should be Gift Candy Boxes, but here in Australia it's about chocolate and lollies, not candy!!  So when I saw these cute little boxes over on one of my favourite websites - Amy Celona.  I just had to try and make one too. 

These little boes were really easy (when following instructions), I made a little window with the new Labels Collections framelits and used a window sheet (acetate) to cover the hole!  The box also has it's own unique way of presenting a tag (as shown above) and you can decorate and embellish as desired.  I used my favourite papers from the Sale-a-Bration (sniff sniff, sadly it's no longer available).  Filled the box with Chocolate Ferroros and the box was done!!


I love this Wisteria Wonder colour, it's so sweet and not overpowering at all (like some purples can be).  It's just sweet.

To make this box yourself, head on over to Amy Celona's website, she has downloadable instructions which are just great!

DIY notepads

I love Butterflies, and I especially love the Butterfly Die exclusive to Stampin' Up!.  It's a must have for so many things.  And even more so for these little Butterfly note pads. 


Now I have no idea where this project originally came from.  I think it might have been at a Stampin' Up! workshop or Convention ever since.  But when I finally got my hands on some coloured note paper, it was the chance I had been waiting for. 

 Now this a project you'll be absolutely forever grateful that you've got the Big Shot.  I cut hundreds (well maybe not hundreds plural!!) of butterflies from paper.  As the note sheets were fairly thin, I was able to do quite a few layers in one go.  I used a scrap piece of cardstock for the base and some scrap DSP for the front.  With some of my cherished ribbons from Sale-a-bration, I used the Peach Parfait ribbon to tie around the DSP butterfly piece only.


And I used my Crop-a-Dile - another fantastic tool!! - to punch a hole.  Love my tools :0), I threaded a ring thingy through and they were done.  And now these are in the hands of my two new friends I've met through Stampin' Up!! 

Chocolate Boxes

Well, I'm back from a week away in Melbourne for Easter (well not quite a week, but it took me that long to recover from unpacking, washing, sleeping etc!!) and I've not had a chance to sit down and create until today.  I have started making thank you cards for all the lovely things in Melbourne that I am grateful for.  I won't share them today as I hadn't finished them quite yet!  But I did want to come back after my Easter Sunday post - click here - where I showed a little transparent box full of Easter Eggs!


This idea was completely inspired ("copied") from the lolly boxes we had the tables at our Stamp Camp.  Our Nautical Expeditions Stamp Camp just happened to be held on St Patrick's Day, so there was a certain amount of green there!!  These boxes use the Petal Cone Die from Stampin' Up! and have been adjusted to make boxes instead of cones.  How cool is that!


Each little box was stamped with green and a little Sentiment was added!  I was lucky enough to be able to take one home and used it to inspire my Easter Box!


 I love how so many of the Stampin' Up! products are versatile for other things.  And using Window Sheets to make see-through boxes to hold Easter Eggs was just divine!!


And did you know you can also use your Embossing Folders to emboss Window Sheets.  Cool!

Happy Easter

Easter is a special time, both a religious occasion and a special time to spend with your family.  Easter is commercialised as being about the chocolate eggs, but for me, Easter is about my family.  We have traditions, we have special recipes and we have a lot of family together time!!


So from my house and home to yours, I wish you a very Happy Easter!


And for all the chocolate lovers, including the big kids, I wish you lots of Easter Eggs!!

Easter Cards

Do you make Easter Cards?  I do.  Living in a different state from my family - I don't often get to spend Easter with my extended family, so I love to send them handmade cards instead.  This year I used punch art to design my cards and I had a lot of fun doing so!


So it's Easter Saturday and as usual I'm cooking Hot Cross Buns and the like at the very last minute, so it was lucky I had prepared these cards in advance!!  These cards were very cute.  Next year, I will have instructions prepared for my monthly workshops and Stamp @ Home classes. 

Good Friday thoughts

Easter is a special time, and Good Friday has its own special significance for my family.  It's a time to reflect, be with your family and appreciate those you love the most.  Today's post is just a moment to reflect what's important.  May this Easter be a safe and special time with your family xx

Image Source


Simply Scored

I'm loving new products and this one is definitely on my wish list .... Maybe my next order!!


Scoring has never been easier or more fun with Stampin’ Up!’s exclusively-designed scoring tool—Simply Scored™! Score cards, makescoring designs or score 3-D projects. It’s fun, fast and easy!

Exclusive features of the Simply Scored include:

  • Place Markers - Our Place Markers let you quickly mark your scoring points for fast, easy and flawless scoring!
  • Stylus - Features an ergonomic style and comfort grip. High-quality metal tips on both ends come in two sizes, so you can choose the size of your score lines.
  • Storage - Store your Stylus, Place Markers and even your Bone Folder* in this hidden compartment!
*Sold separately (IB&C 148)

 Have a look at the new Autumn-Winter Mini Catalogue for more information and be sure to contact me if you would like to have one yourself!!

Apothecary Art

Don't you just love playing with new things!!  I sure do, and I especially love the new things in the Autumn-Winter Mini Catalogue.  To be honest, I've only got two new products from this Mini (although my wish list is HUGE!!).  And I just had to get them straight away!!  The Apothecary Art stamp set and the coordinating Labels Collection Framelits. 


I made these cards in four different ways, this first card has the stamped focal image layered flat onto the card base.  I've used my Mat Pack & Pricking Tool to add interest around the edge.


The second card (first one in this image and also below) has the aperture cut out with the framelits and the Whisper White cardstock with the stamped image behind, popped up with Stampin' Dimensionals.


I had a lot of fun using my Blender pens and inkpads colouring these flowers.  They're just so pretty!!  I used the In-Colour collection and I think they blend together beautifully!  I've also spritzed over with Sahara Sand ink.


The second card has the aperture cut with the framelits and the focal image (also die cut with the framelits) adhered to the inside of the card.


I've stamped my sentiment with Island Indigo, added some pearls and the cards were done.  They were all pretty and each one of them have gone to their recipients.  Late I might add.  I made the cards a week or so ago, but for no particular reason they didn't make it to the post office on time.  My bad :( and I will try to be on top of card sending as per my New Years resolution!!

I hope you enjoyed my cards!!


Carry over products!!

In all the excitement of announcing the new Autumn-Winter Catalogue yesterday, I forgot to announce that some of the gorgeous products of the just finished Summer Mini Catalogue are carrying over!  Yay!


These products are:

  • Red glimmer paper $8.95
  • Silver glimmer paper 48.95
  • Candy wrapper bigz L die $59.95
  • Flower garden textured impressions embossing folder $14.95
  • 1" (2.5cm) square punch $30.95
  • Postage stamp punch $30.95
  • Iridescence ice stampin' emboss powder $8.95
  • Early espresso bakers twine $4.95
  • Cherry cobbler bakers twine $4.95
  • White bakers twine $4.95
  • Spice cake designer fabric $19.95
  • Love blossoms stampin' around wheel $11.95

Don't be sad!  Some of the gorgeous products of the Summer Mini Carryover are still available!!


Click here to download the flyer and contact me to make an order for any products of the current catalogues AND the Summer Mini carryover items!

The Autumn-Winter Mini Catalogue has arrived!

The new Autumn-Winter Mini Catalogue has arrived.


Take a look in the new Autumn-Winter Mini Catalogue for new products, including the new Scoring Tool, Framelits, Edgelits, as well as gorgeous stamp sets and embellishments ..... this Mini Catalogue has it all! Click on this link to download the PDF of the Mini Catalogue!

Want to make the projects in the Mini Catalogue - You can download the supplies list for all the projects here!

My lovely customers will very soon receive their own copy of the Mini Catalogue in the mail.  If you would like a copy mailed to you, please email me with your mailing details (Australian residents only please) and I'll be pop a catlogue in the mail to you.
The products in this Mini will be available from 1 April 2012 - 31 July 2012.

If you would like to place an order, hold a workshop, or if you have any questions, please contact me and I'll be more than happy to help!

Stay tuned over the next few days as I share highlights from the must-have Mini Catalogue!!

LinkWithin

Blog Widget by LinkWithin
Blogging tips